Get Ready to Run! #
Get your engines running by following the instructions in the quick start guide.
1. Thread the external antenna onto the port on the back of the Base3.
2. Connect a wire to the TRACK U post on the back of the Base3. Connect the other end to the ground/U terminal of your AC transformer or the outside rails of your track.
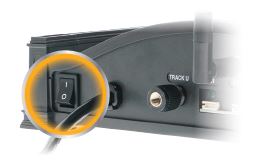
3. Plug your Base3 power cord into a grounded wall outlet. WARNING! 120VAC ONLY!
4. Flip on the power switch on the back of the Base3. The Base3 will flash its front lights for approximately 15 seconds while performing a systems check. When it finishes, the lights on the front will go out and the LIONEL lights at the ends will pulse, indicating that it’s ready to go!

5. Turn on your CAB hardware remote or download the Cab3 APP.
6. Address the TMCC ID of your engine and learn to use the Velocity Throttle, Whistle, Bell, Brake and Direction commands.
Location #
For smaller layouts you can locate the Base3 anywhere on, near, or under the layout.
For a large model railroad layout, the best position for your Base3 is as close to the center of your model railroad as you can get. This gives maximum communication strength to every corner of your layout. Experiment for the most advantageous position of your Base3.
Power Up the Track #
With your engine on the track and ready to roll, power-up your track to a constant 18VAC. If a circuit breaker trips when you turn on the LIONEL power supply, check the wheels of your locomotive and any cars to make sure they are all securely on the track. Check to make sure the track is free of all metals that may cause a short circuit.
Get to know your Base3 #
It’s important to know what the various external features of the Base3 are.
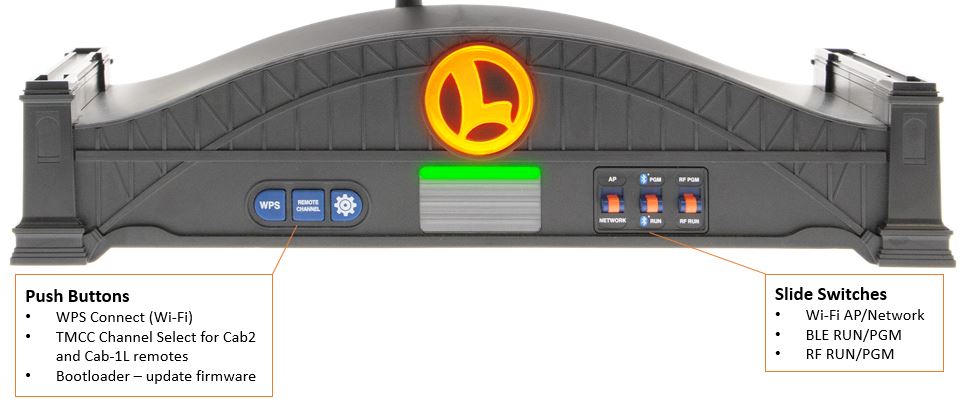
Let’s start with the front. The below image describes the push buttons and slide switches on the front of the Base3.

Push button functions:
- WPS Connect: This is used for connecting your Base3’s Wi-Fi to your home Wi-Fi network. Click here for more details.
- Remote channel: Set the remote channel number (1 through 9) on your Cab2 or Cab-1L handheld remote. Click here for more details.
- Bootloader: The icon is a gear. This is used when updating the Base3’s firmware. Click here for more details.
Slide switch functions:
- Wi-Fi AP/Network: Set the Base3’s Wi-Fi to either Access Point or set it to join an existing Wi-Fi Network. Click here for more details.
- BLE RUN/PGM: For programming Bluetooth LionChief engines into the Base3. Click here for more details.
- RF RUN/PGM: For programming RF LionChief engines into the Base3. Click here for more details.
The functionality of the various lights on all sides of the Base3 are described here.
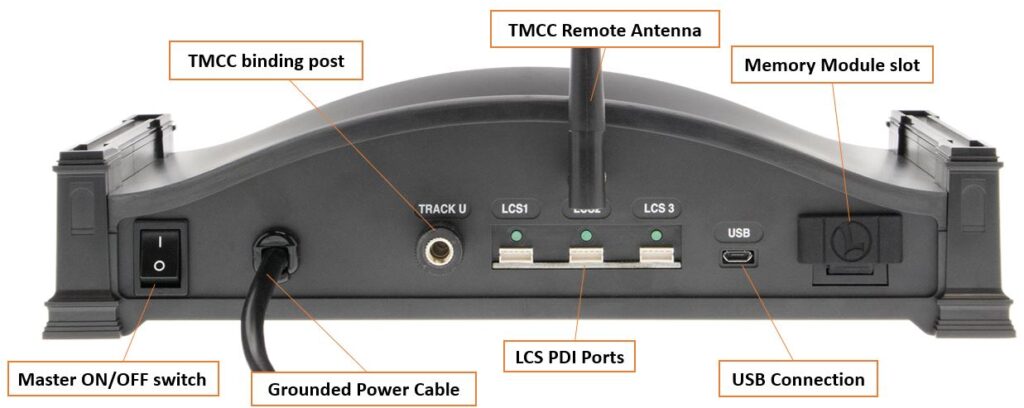
Now onto the back of the Base3. The image below shows the various features on the rear of the Base3.

Back plate feature listing:
- Master ON/OFF Switch: This turns on and off the main power to the Base3.
- Grounded Power Cable: This should be plugged into a 120VAC outlet only. Using a 240VAC power source will damage the Base3. Make sure the outlet is earth grounded as that is critical for TMCC/Legacy communications.
- TMCC Binding Post: Connect this post to your AC transformer’s ground/neutral post or to your layout’s grounded outside rails on the track. This sends the TMCC/Legacy signals to the locomotives on the track.
- LCS PDI Ports: 3 different connections for adding LCS components to your layout.
- TMCC Remote Antenna: Used for a Cab2 or Cab-1L remote to communicate to with the Base3.
- USB connector: Used for a physical connection to a PC with the included USB cable.
- Memory Module slot: Use a Lionel Memory Module to upload your Base2 database, add individual engine information, backup the Base3 2-digit database, and more.


